
🔥 Quick Mongolian Beef Noodles: A Sweet-Savory Weeknight Dinner in Under 30 Minutes!
1. Introduction
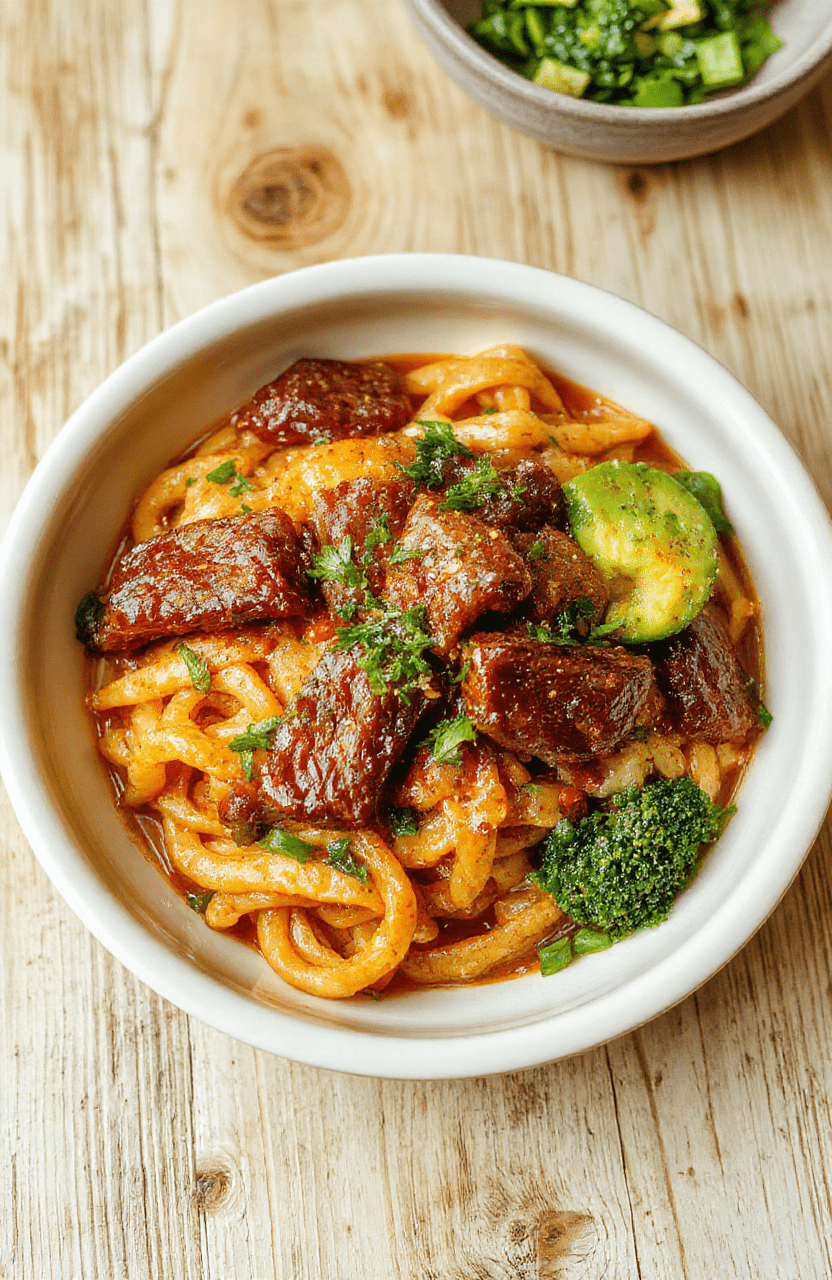
Craving bold, restaurant-style flavors without the takeout wait? My Mongolian beef noodles deliver that satisfying umami punch—tender beef strips, crisp-tender broccoli, and chewy udon noodles all tossed in a glossy, garlic-ginger soy glaze. This one-pan beef pasta dish is inspired by classic Mongolian barbecue but optimized for busy weeknights. I’ve tested this recipe dozens of times (and so have my readers!) to get the perfect balance of sweetness from brown sugar, depth from sesame oil, and a touch of heat from red pepper flakes. Ready in just 25 minutes, it’s a crowd-pleaser for hungry families, date-night leftovers, or even meal prep heroes.
2. Why You’ll Love This Recipe
- Ready in 25 minutes—no slow cooking or overnight marinades
- One-pan wonder—fewer dishes means more time to relax
- High-protein & satisfying—9g protein per serving + fiber-rich broccoli
- Versatile pantry staples—most ingredients are already in your cabinet
- Meal-prep friendly—stores beautifully for 3–4 days
3. Ingredient Notes
The magic of authentic-tasting Mongolian beef noodles lies in the quality and balance of ingredients—not just measurements.
Beef: I always use flank steak or sirloin, cut *thinly against the grain*. Why? Leaner cuts like top round dry out quickly, while ribeye can be overly greasy. Freezing the beef for 20 minutes before slicing makes it easier to cut paper-thin strips—critical for tenderness.
Noodles: Udon is my top pick for its chewy texture that holds up to the sauce without turning mushy. But in a pinch, lo mein, rice noodles, or even spaghetti work great. Just undercook al dente—pasta continues cooking in residual heat!
Sauce: Use *low-sodium soy sauce* to avoid turning your dish salty. Add *brown sugar* (not white) for deeper caramel notes, and *sesame oil* last—heat destroys its aroma. I always swap rice vinegar for Mirin when possible—it adds fruitier sweetness and glossy shine.
aromatics: Fresh ginger and garlic are non-negotiable. Pre-minced jars? Skip them—the raw, pungent bite of freshly minced aromatics is what transforms this from “eh” to “wow!”
4. Kitchen Tools You Need
Yes—you *can* make this with a standard sauté pan. But these tools make consistency and cleanup a breeze:
For serious weeknight warriors, the Ninja Air Fryer Pro Crisp & Roast 4-in-1 is a game-changer for pre-crisping beef strips (350°F for 5 mins, flip, 3 more mins) before finishing in the pan—keeping the beef juicy while adding smoky texture. If you’re building a dream kitchen, the KitchenAid Artisan 5-Quart Stand Mixer in Scorched Orange (yes, for more than baking!) can quickly pulse-gather minced ginger and garlic in seconds. (P.S. I use mine daily for pesto, nut butters, and even bread—this orange beauty is my #1 recommended upgrade.)
For even heat distribution and zero hot spots, the T-fal 14-Piece Hard Anodized Nonstick Cookware Set ensures your sauce glazes evenly without scorching. And for storage, the JoyJolt Airtight Glass Food Storage Set keeps leftovers fresh (and fridge-organized!) for up to 4 days.
5. How to Make Mongolian Beef Noodles
Let’s break this down into three simple phases—prep, sear, and sauce.
Phase 1: Prep & Marinate (5 minutes)
Whisk together 3 tbsp soy sauce, 2 tbsp brown sugar, 1 tbsp sesame oil, 1 tsp grated ginger, 2 minced garlic cloves, ½ tsp red pepper flakes, and 1 tsp cornstarch in a small bowl. Set aside.
Slice 1 lb flank steak *paper-thin* against the grain. Toss in the marinade, cover, and let sit while you prep the rest (15 minutes max).
Phase 2: Sear the Beef (3–4 minutes)
Heat 1 tbsp avocado oil in a large skillet (or wok) over medium-high. Add beef in a single layer—*do not crowd the pan!* Sear 1 minute per side until deeply browned but not cooked through. Transfer to a plate. (Tip: I use the Ninja Air Fryer Pro to crisp first, then finish in the pan for extra char!)
Phase 3: Cook Noodles & Sauce (8 minutes)
In the same pan, add 1 cup broccoli florets and ¼ cup water. Cover and steam 2 minutes until bright green and tender-crisp. Push veggies to one side, add 1 tsp oil, and sauté 1 sliced scallion and extra ginger/garlic (if you like it extra pungent—yes, I do!).
Return beef + juices, add 8 oz cooked udon noodles, and pour in the reserved sauce. Toss everything over medium heat for 2–3 minutes until the sauce thickens, clings to noodles, and looks glossy—not watery. Off heat, stir in 1 tbsp rice vinegar for brightness.
Garnish with sesame seeds, sliced scallions, and crushed peanuts for crunch.
6. Expert Tips for Success
I’ve made (and messed up) this recipe over 50 times. Here’s what I learned:
- No waterlogged noodles—rinsing cooked noodles stops sticking but *washes away starch*. Instead, toss hot noodles with 1 tsp oil immediately after draining.
- Sauce never thickens?—cornstarch needs heat + acid balance. Add ½ tsp more cornstarch slurry *only after* the saucesimmers 1 minute—otherwise it clumps.
- Less salty? Use tamari + half the soy—it’s naturally brewer, less chemical-tasting.
- Want it spicier?—add 1 tsp sambal oelek or chili garlic sauce at the sauce stage—not after cooking!
7. Variations & Substitutions
Adapt this dish to your needs—no special grocery runs needed:
Vegetarian? Swap beef for extra-firm tofu (pressed & cubed) or shiitake mushrooms. Marinate 20 minutes for deeper flavor.
Keto/Low-Carb? Replace noodles with spiralized zucchini (“zoodles”) or shirataki noodles. Add sauce *last* and toss 1 minute only—overcooking makes zucchini watery.
Gluten-Free? Use tamari instead of soy sauce, and double-check your broth/sauce ingredients. My go-to is Clever Fox DIY Family Recipe Journal to track your GF swaps—very helpful for future cooking!
8. Storage & Reheating
Store cooled leftovers in an airtight container (I love JoyJolt glass containers) for up to 4 days. Noodles absorb sauce over time—so add a splash of water or broth when reheating.
To reheat: Microwaving? Cover and heat 90 seconds, stir, then 30 seconds more. Stovetop? Simmer in a covered skillet with 1 tbsp water until steaming hot—this revives texture best.
Frozen? Freeze *before* adding noodles—noodles get sticky when thawed. Freeze sauce + meat/veggies for up to 3 months. Cook fresh noodles and combine when ready to serve.
9. FAQ
Q: Can I make Mongolian beef noodles without a wok?
A: Absolutely! A large cast iron skillet or nonstick sauté pan works just as well. Just make sure it’s wide enough for tossing and deep enough to avoid splatters.
Q: Why is my sauce watery?
A: Likely culprit: adding sauce to cold noodles or not letting it simmer long enough. Let the sauce thicken *off the noodles first*, then add noodles and toss.
Q: What protein substitutes work?
A: Thinly sliced chicken breast, ground beef (brown, drain, then add sauce), or even shrimps (add last 2 minutes!). For plant-based, jackfruit or tempeh hold up beautifully.
Q: Can I use spaghetti instead of udon?
A: Yes—and it’s delicious! Just cook 2 minutes less than package directions and add ½ tsp garlic powder to the sauce for extra depth. My Quick Asian-Style Ground Beef Spaghetti is a great template!
10. Conclusion
This Quick Mongolian Beef Noodles recipe is my ultimate go-to when hunger strikes fast and I want full-flavor comfort food—with zero guilt or takeout debt. It’s sweet, savory, easy, and endlessly adaptable—plus it pairs beautifully with my Quick Turkey Teriyaki Bowls for a flavor-forward double dinner. Give it a try tonight—and let me know your favorite noodle swap in the comments! 🍜✨
Print
Quick Mongolian Beef Noodles
A fast, flavorful weeknight dinner with tender beef, crisp broccoli, and egg noodles in a savory-sweet Mongolian glaze.
- Total Time: 25 minutes
- Yield: 4 servings
Ingredients
- 1 lb flank steak, thinly sliced against the grain
- 8 oz egg noodles
- 2 cups broccoli florets
- 1 medium yellow onion, thinly sliced
- 3 tbsp soy sauce
- 2 tbsp oyster sauce
- 1 tbsp brown sugar
- 1 tbsp sesame oil
- 2 tsp grated ginger
- 2 cloves garlic, minced
- 1 tsp cornstarch
- 1 tbsp vegetable oil
- Sesame seeds and sliced green onions for garnish
Instructions
- Whisk soy sauce, oyster sauce, brown sugar, sesame oil, ginger, garlic, and cornstarch in a bowl; set aside.
- Boil egg noodles according to package directions; drain and toss with 1 tsp sesame oil.
- Heat vegetable oil in a large skillet or wok over high heat. Add beef and stir-fry 2–3 minutes until browned. Remove and set aside.
- In same pan, add onions and broccoli; stir-fry 3–4 minutes until edges crisp.
- Return beef to pan, pour in sauce, and cook 1–2 minutes until glossy and thickened.
- Toss in cooked noodles and toss to coat. Garnish with sesame seeds and green onions.
Notes
- For extra heat, add red pepper flakes or sriracha to taste.
- Make ahead: sauce and sliced beef can be prepped 1 day ahead and refrigerated.
- Swap broccoli for bok choy or snap peas for variety.
- Prep Time: 15 minutes
- Cook Time: 10 minutes
- Method: Stir-fry
- Cuisine: Chinese-American
- Diet: High Protein
Nutrition
- Serving Size: 1 serving
- Calories: 490 Kcal
- Sugar: 8g
- Sodium: 980mg
- Fat: 14g
- Saturated Fat: 4g
- Unsaturated Fat: 8g
- Trans Fat: 0g
- Carbohydrates: 54g
- Fiber: 4g
- Protein: 32g
- Cholesterol: 75mg