🧀 Quick Hawaiian Roll Grilled Cheese: A 15-Minute Comfort Food Hero
1. Introduction
When life gets busy and dinner needs to happen now, the Hawaiian roll grilled cheese saves the day — and your taste buds. This upgrade on the classic takes the sweet, soft, slightly buttery notes of Hawaiian rolls and melts them into ultimate cozy perfection. In just 15 minutes, you’ll have crispy, golden crusts hugging tender, melty cheese and pillowy-soft centers — no oven, no fancy tools, just pure comfort on a plate. If you love easy weeknight dinners like our Dump-and-Go Smothered Pork Chops or sweet-spicy crowd-pleasers like Honey Pepper Chicken, this grilled cheese is your next go-to.
2. Why You’ll Love This Recipe
- Ready in 15 minutes — faster than takeout and 100% more satisfying.
- Uses pantry staples and a single skillet (or even your air fryer!).
- Bonus: The sweet Hawaiian rolls counterbalance the sharpness of the cheese in the *best* way — sweet, salty, tangy, and creamy all at once.
- kid-approved, college-budget-friendly, and perfect for game-day snacks.
- Super easy to customize — try adding ham, apples, or jalapeños!
3. Ingredient Notes
The secret to a standout Hawaiian roll grilled cheese is in the details. First — Hawaiian rolls (like Rhodes or homemade). Don’t substitute with plain dinner rolls; their buttery, sweet dough is essential. Look for soft, slightly golden rolls that aren’t dried out — they should spring back when gently pressed.
For cheese, we love a combo of shredded sharp cheddar and sliced American. Cheddar adds punch and depth, while American ensures creamy meltability. You can swap in Monterey Jack or Gruyère if you prefer, but avoid超 hard cheeses like aged Gouda — they won’t melt as smoothly in a quick 15-minute cook.
For cheese, we love a combo of shredded sharp cheddar and sliced American. Cheddar adds punch and depth, while American ensures creamy meltability. You can swap in Monterey Jack or Gruyère if you prefer, but avoid超 hard cheeses like aged Gouda — they won’t melt as smoothly in a quick 15-minute cook.
4. Kitchen Tools You Need
You really only need a decent skillet — but having the right tools makes cleanup and consistency a breeze. If you’re short on time, consider upgrading to the Compact 6-in-1 Digital Air Fryer by Amazon Basics, which crisps grilled cheese evenly without flipping. Or go all-in with the Ninja Foodi Smart XL Indoor Grill & Air Fryer Combo — it delivers serious sear and smoke flavor in minutes.
For full cookware peace of mind, the T-fal 14-Piece Hard Anodized Nonstick Cookware Set is a kitchen workhorse that won’t warp or scratch easily — ideal for daily grilled cheese runs.
For full cookware peace of mind, the T-fal 14-Piece Hard Anodized Nonstick Cookware Set is a kitchen workhorse that won’t warp or scratch easily — ideal for daily grilled cheese runs.
5. How to Make Quick Hawaiian Roll Grilled Cheese
Phase 1: Prep & Prep Your Rolls
Preheat a large nonstick skillet (or griddle) over medium-low heat. Lightly butter one side of each Hawaiian roll — this becomes your “crispy crust” side. Slice each roll horizontally (like a hamburger bun) *just enough* to open it up — don’t cut all the way through. Open the rolls like little sandwiches and layer 1–2 tablespoons of cheese inside. Close the rolls gently.
Phase 2: Low & Slow Sear
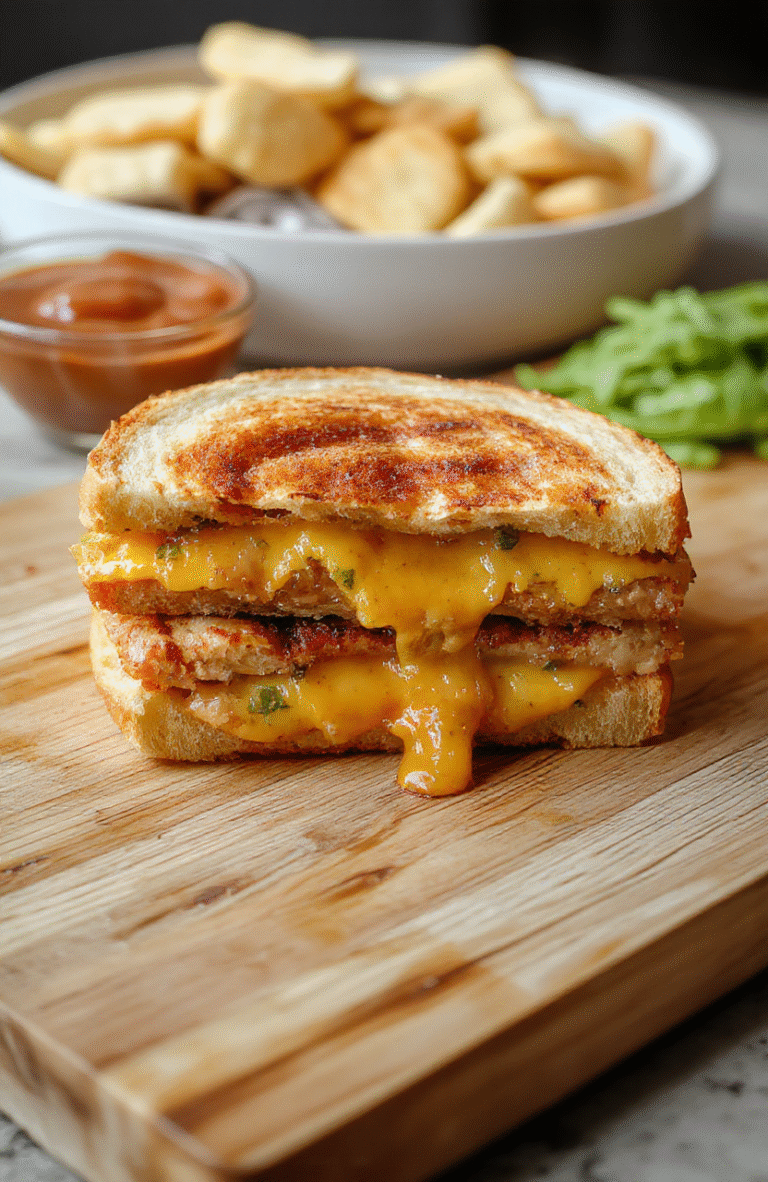
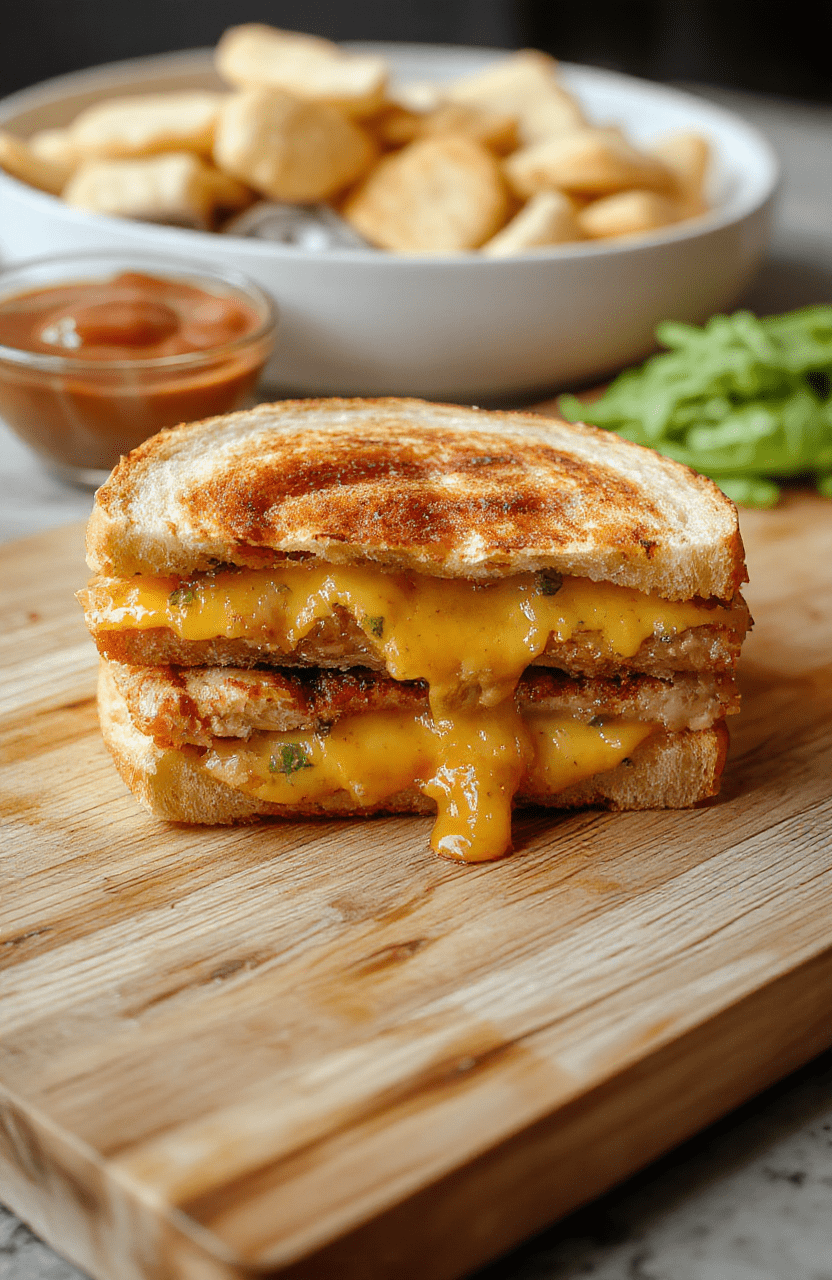
Place the filled rolls, buttered side down, onto the preheated skillet. Press down *lightly* with a spatula — not too hard, just enough to encourage even contact. Let them cook for 2–3 minutes until the bottom is deep golden brown and the cheese starts to peek through the sides. Flip and cook for another 2–3 minutes until the second side is equally crisp and the cheese is fully melted (internal temperature should reach 165°F if you’re checking).
Phase 3: Rest & Serve
Transfer grilled cheese rolls to a plate and let them rest for 1 minute — this helps the cheese set just enough so it doesn’t gush out the moment you bite in. Serve warm with a side of tomato soup, pickles, or even a drizzle of maple syrup for the ultimate sweet-savory twist.
6. Expert Tips for Success
- Don’t rush the heat: Medium-low prevents burnt exteriors with cold centers. Too hot = burnt bread, undermelting cheese.
- Butter both the skillet and rolls: A thin layer of butter in the pan ensures even crisping and prevents sticking.
- Warm the rolls first: Briefly microwave for 10 seconds before assembling — this prevents cracking and improves meltability.
- Use pre-shredded *or* block cheese, but grate it yourself: Pre-shredded cheeses often contain anti-caking agents that hinder melt. A quick toss in a spice grinder helps!
7. Variations & Substitutions
- Ham & Cheese: Add thinly sliced Black Forest ham inside before grilling.
- Apple-Chutney Crunch: Spread a thin layer of apple butter or fig jam on the inside before adding cheese.
- Spicy Kick: Toss in sliced jalapeños or a smear of chipotle mayo.
- Gluten-Free: Use a gluten-free dinner roll (brand like Schar or Canyon Ridge).
- Vegan: Swap rolls for dairy-free sandwich buns and use Miyoko’s or Violife cheese.
8. Storage & Reheating
Store leftovers in an airtight container in the fridge for up to 3 days. To reheat:
• Oven: 350°F for 8–10 minutes, foil-covered, then uncovered for the last 2 minutes to re-crisp.
• Air Fryer: 300°F for 3–4 minutes — the Ninja FlexFlame or Air Fryer Pro work great here.
Avoid the microwave — it makes the bread tough and rubbery. Just sayin’. 😅
• Oven: 350°F for 8–10 minutes, foil-covered, then uncovered for the last 2 minutes to re-crisp.
• Air Fryer: 300°F for 3–4 minutes — the Ninja FlexFlame or Air Fryer Pro work great here.
Avoid the microwave — it makes the bread tough and rubbery. Just sayin’. 😅