

© Original Recipe By Serena’s Flavor Lab ©
🍞🧄 Irresistibly Crispy & Aromatic: Your Guide to Quick Garlic Focaccia Bread! 🍞🧄
1. Introduction
If you’ve ever craved a warm, fragrant slice of bread with a crispy crust and an aroma that fills your kitchen, then this quick garlic focaccia bread is your new best friend. This savory bread combines soft, airy insides with a golden, crispy exterior, infused with garlic and herbs that awaken your senses. Whether you’re making it for a casual snack or a sophisticated appetizer, this recipe guarantees satisfying bites in less than an hour — perfect for busy weeknights or last-minute gatherings.
2. Why You’ll Love This Recipe
- Ready in just 30-40 minutes, making it perfect for spontaneous cravings.
- One-pan preparation, minimizing cleanup and cookware clutter.
- Versatile flavor profile, easily customized with herbs, cheese, or toppings.
- Deliciously crispy crust, with soft, pillowy interiors that melt in your mouth.
3. Ingredient Notes
Creating an exceptional garlic focaccia starts with choosing high-quality ingredients. Opt for a sturdy, nonstick cookware set like the T-fal 14-Piece Hard Anodized Nonstick Cookware Set to ensure even heat distribution and easy handling. Fresh garlic is essential for that bold aroma; prefer local organic garlic for maximum flavor. Use good quality extra virgin olive oil—its fruity richness elevates every bite. For the flour, bread flour will give you that chewy, airy structure, while all-purpose can work if you prefer a softer crust.
Don’t forget to season generously with sea salt and fresh herbs like rosemary or thyme for an authentic taste. For those seeking a chewier texture, consider adding a touch of dried oregano or Italian seasoning.
4. Kitchen Tools You Need
To make this garlic focaccia bread effortless and perfectly baked, consider investing in some helpful kitchen tools:
- Compact 6-in-1 Digital Air Fryer from Amazon Basics: An excellent appliance for quick baking and reheating, giving your focaccia a delightful crispy finish without turning on the oven.
- Ninja Foodi Smart XL Indoor Grill & Air Fryer: Perfect for achieving a beautifully golden crust with maximum crispiness.
5. How to Make Quick Garlic Focaccia Bread
Prepare the dough
Start by mixing bread flour, yeast, salt, and a pinch of sugar in a large bowl. Warm some water and olive oil, then combine with the dry ingredients to form a sticky dough. Cover with a damp towel and let it rise for about 15 minutes — it might not double in size, but it should look slightly puffed up and aromatic.
Shape and top the bread
Transfer the dough to a greased baking sheet or a cast-iron skillet. Press and stretch the dough evenly, creating small dimples with your fingertips. In a small bowl, mix chopped garlic with olive oil and brush generously over the surface. Sprinkle coarse sea salt, fresh herbs, and drizzle with extra virgin olive oil for that rich, aromatic finish. Look for a shiny, fragrant surface before baking.
Bake to perfection
Place it in a preheated oven at 450°F (232°C). Bake until golden brown around the edges—about 12-15 minutes. The crust should be crisp, and the garlic topping bubbling slightly. Remove from oven, cool briefly, then slice and serve!
6. Expert Tips for Success
- Use lukewarm water to activate the yeast more easily, ensuring a good rise.
- Few things beat the aroma of freshly minced garlic—add it closer to baking to prevent burning.
- For extra flavor, sprinkle grated Parmesan or rosemary just before baking.
- If your crust isn’t as crispy as you’d like, broil it for 1-2 minutes, keeping a close eye to prevent burning.
7. Variations & Substitutions
Want to customize your garlic focaccia? Consider these options:
- Vegan version: Use vegan butter or olive oil instead of dairy-based toppings.
- Cheesy focaccia: Add shredded mozzarella, Parmesan, or a sprinkle of nutritional yeast just before baking.
- Herb-infused: Mix fresh basil, oregano, or parsley into the dough or toppings for added freshness.
- Gluten-free: Substitute bread flour with a gluten-free mix, though results may vary in texture.
8. Storage & Reheating
To keep your garlic focaccia fresh, store leftovers in an airtight container at room temperature for up to 2 days. For longer shelf life, freeze in a zip-top bag for up to a month. Reheat in an air fryer (Ninja Air Fryer Pro Crisp & Roast) at 350°F for 3-4 minutes to revive its crispy crust. Avoid microwaving, as it will soften the bread.
9. FAQ
How do I get my garlic focaccia crispy?
A high oven temperature and brushing the top with olive oil before baking help develop a crispy crust. Broiling briefly at the end can enhance this effect.
Can I make this focaccia ahead of time?
Yes, prepare and bake up to a day in advance. Reheat in an air fryer or oven to restore crispiness.
Is garlic focaccia suitable for beginners?
Absolutely! With simple ingredients and straightforward steps, this recipe is perfect for home bakers of all levels aiming for professional-quality results.
10. Conclusion
There’s something truly special about pulling warm, aromatic garlic focaccia bread from your oven, filling your home with irresistible scents. With this quick and easy recipe, you can enjoy the comforting crunch and savory flavors anytime. Whether paired with dips, soups, or enjoyed on its own, this bread promises to become a favorite in your culinary repertoire. Happy baking!
Print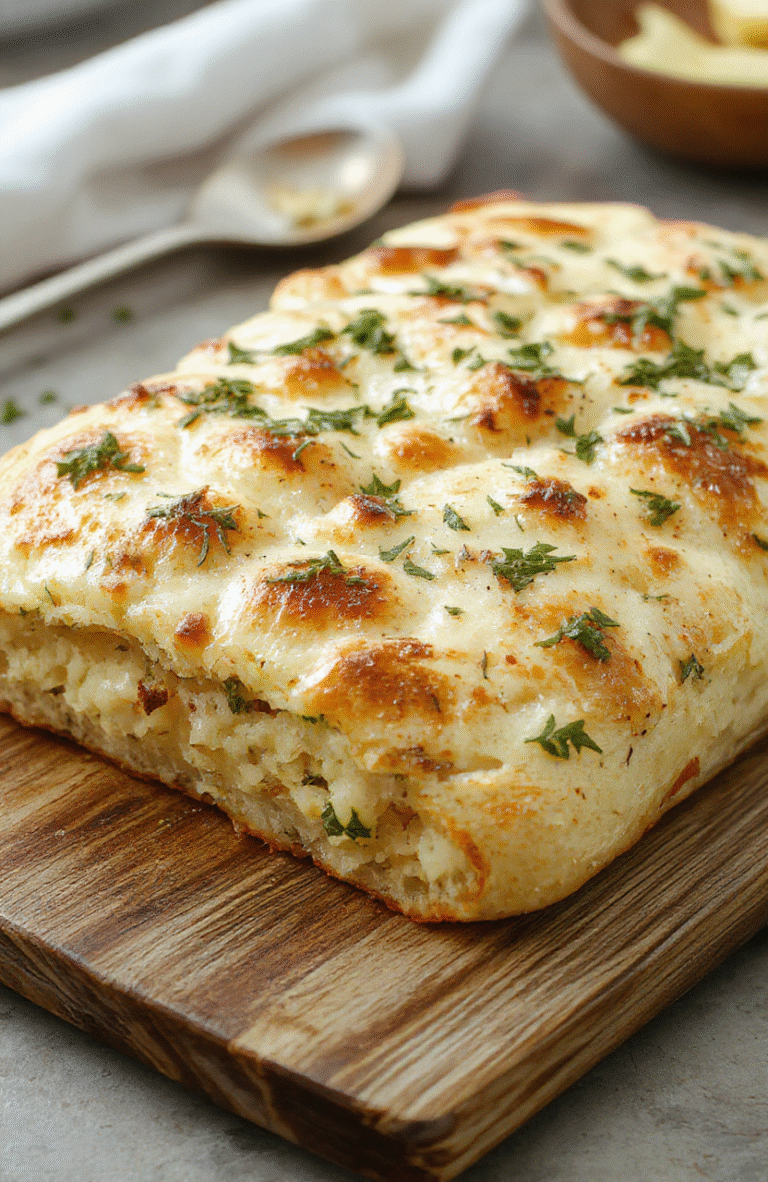
Quick Garlic Focaccia Bread
A quick, savory focaccia bread topped with garlic, herbs, and olive oil, baked until golden and crispy on top, with a soft, airy interior.
- Total Time: 40 minutes
- Yield: 8 slices
Ingredients
Scale- 2 cups all-purpose flour
- 1 teaspoon sugar
- 1 teaspoon salt
- 1 tablespoon active dry yeast
- 3/4 cup warm water
- 3 tablespoons olive oil
- 3 garlic cloves, minced
- Fresh rosemary or thyme
- Sea salt for topping
Instructions
- In a small bowl, combine warm water, yeast, and sugar. Let sit until frothy, about 5 minutes.
- In a large mixing bowl, whisk together flour and salt. Add yeast mixture and 2 tablespoons of olive oil. Knead until smooth.
- Cover the dough and let rise for 30 minutes in a warm place.
- Preheat oven to 400°F (200°C). Punch down the dough and transfer to a greased baking sheet.
- Press the dough evenly, then make dimples with your fingertips. Brush with remaining olive oil.
- Sprinkle minced garlic, herbs, and sea salt on top.
- Bake for 20-25 minutes until golden brown. Serve warm.
Notes
- For extra flavor, add roasted garlic or olives on top before baking.
- Use gluten-free flour for gluten-free version.
- Prep Time: 10 minutes
- Cook Time: 20-25 minutes
- Method: Bake
- Cuisine: Italian
- Diet: Vegetarian
Nutrition
- Serving Size: 1 slice (about 50g)
- Calories: 150 Kcal
- Sugar: 1g
- Sodium: 250mg
- Fat: 7g
- Saturated Fat: 1g
- Unsaturated Fat: 5g
- Trans Fat: 0g
- Carbohydrates: 20g
- Fiber: 1g
- Protein: 4g
- Cholesterol: 0mg