

🍯 Crispy Honey Butter Chicken with Roasted Vegetables 🧄 — A Quick Weeknight Chicken Dinner That Feels Like a Michelin Moment
1. Introduction
This honey butter chicken is one of those dishes that looks fancy enough for a dinner party but comes together in under 40 minutes—perfect for a quick weeknight chicken dinner that doesn’t feel rushed. Tender chicken bites get seared to golden perfection, then tossed in a rich, glossy glaze made with real butter, pure honey, garlic, and a hint of lemon zest. Paired with perfectly roasted seasonal vegetables, every bite balances sweet, savory, and aromatic notes that keep you coming back for more. And the best part? It’s all made on one sheet pan for minimal cleanup and maximum flavor synergy.
2. Why You’ll Love This Recipe
- One-pan honey butter chicken – Everything roasts together, enhancing flavors and cutting down on dishes.
- Ready in 30–35 minutes – Ideal for busy weeknights when you still want restaurant-worthy results.
- Balanced flavor profile – The honey butter sauce isRich, not cloying, thanks to a touch of lemon juice and acid to brighten it up.
- Family-friendly & crowd-pleasing – Kids and adults alike go bananas for the sweet-savory glaze and tender chicken.
- Versatile base – Swap vegetables based on what’s in season or what you have on hand.
3. Ingredient Notes
Using quality, intentional ingredients makes this honey butter chicken memorable—not just tasty, but *authentic* and deeply satisfying.
Chicken – Boneless, skinless chicken thighs are my go-to because they stay juicy even with high-heat roasting. If you prefer breasts, cut them into even 1-inch pieces to avoid dry spots.
Honey – Use 100% pure, raw, or local honey if possible. Its natural enzymes and floral notes add complexity that supermarket blends lack. Avoid “honey-flavored” syrups—they’ll create a flat, overly sweet sauce.
Butter – European-style cultured butter (like Kerrygold or Plugrá) gives a deeper, slightly tangy richness that pairs beautifully with the honey and garlic.
Garlic & Ginger – Fresh is non-negotiable here. Minced garlic caramelizes quickly with the honey, while grated ginger adds a bright, clean warmth that cuts through the richness.
Vegetables – I recommend a mix of root vegetables (like carrots and parsnips) and cruciferous (like broccoli or Brussels sprouts) for texture contrast. Cut them evenly—about 1.5 inches—for uniform cooking.
Seasonings – kosher salt for seasoning throughout, black pepper for bite, and a pinch of red pepper flakes (optional) for subtle heat that balances the sweetness.
4. Kitchen Tools You Need
While you *can* make this honey butter chicken with basic equipment, these tools help elevate both the result and the ease of prep:
For a compact, high-performance air fryer option that’s perfect for extra-crispy chicken bites or reheating leftovers without sogginess, the Compact 6-in-1 Digital Air Fryer by Amazon Basics is surprisingly powerful for its size.
If you’re building or refreshing your full kitchen set, the T-fal 14-Piece Hard Anodized Nonstick Cookware Set offers durable, even heat distribution and a reliable nonstick surface—ideal for slicing and serving directly from pan.
For serious roasting power and versatility (hello, air fry *and* roast modes), consider the Ninja Foodi Smart XL Indoor Grill & Air Fryer Combo. It sears chicken like a pro and can crisp veggies in half the time.
KitchenAid Artisan 5-Quart Stand Mixer in Scorched Orange isn’t strictly necessary for this recipe—but if you like making homemade marinades, batters, or doughs to pair with your honey butter chicken, it’s a joyful workhorse that makes prep effortless.
For efficient veggie prep, the Fullstar Ultimate Veggie Prep Master slices, shreds, and julienne’s vegetables in seconds—great for matching your carrots, zucchini, or bell peppers to the chicken’s roast time.
And for clean storage afterward, the JoyJolt Airtight Glass Food Storage Set keeps your honey butter chicken leftovers fresh, stackable, and microwave-safe for quick lunches all week.
5. How to Make Honey Butter Chicken with Roasted Vegetables
Phase 1: Prep & Par-Roast Vegetables
Preheat oven to 425°F (220°C). While the oven heats, wash, peel (if desired), and cut vegetables into uniform pieces—about 1.5-inch chunks. Toss with 1 tbsp olive oil, ½ tsp salt, and ¼ tsp black pepper. Spread in a single layer on a large rimmed baking sheet (lined with parchment for easier cleanup).
Roast for 15 minutes. This par-cooks vegetables like carrots and potatoes so they don’t stay tough when the chicken joins the pan later.
Phase 2: Prep & Sear the Chicken
In a small bowl, whisk together 3 tbsp honey, 2 tbsp melted butter, 2 minced garlic cloves, 1 tsp lemon zest, 1 tbsp lemon juice, ½ tsp salt, ¼ tsp red pepper flakes (if using), and ¼ tsp ground black pepper.
Pat chicken pieces *very* dry—this ensures a golden crust. After the vegetables’ first roast, push them to the edges of the pan and place chicken in the center in a single layer. Drizzle half the honey butter glaze over the chicken and place back in the oven for 10 minutes.
Phase 3: Toss & Final Roast
Remove the pan, flip the chicken, and carefully toss the vegetables. Pour the remaining glaze over everything and spread evenly. Return to oven and roast 8–10 more minutes, or until chicken reaches 165°F internally and vegetables are fork-tender with caramelized edges.
For extra glaze richness, broil on high for 1–2 minutes at the end—just *watch closely* to avoid burning the honey.
6. Expert Tips for Success
My tested notes for flawless honey butter chicken every time:
- Dry chicken = crispy chicken – Always pat chicken thoroughly before seasoning and placing on the pan.
- Don’t overcrowd – Use two sheet pans if your pan is too crowded; the chicken needs space to crisp instead of steam.
- Glaze later, not early – Adding all the honey butter glaze at the start risks burning. The sugar caramelizes fast—wait until the last 15 minutes to add it.
- Rack vs. flat pan? – If you want extra-crispy chicken, use a wire rack set *over* the veggie-filled pan. The air circulates underneath, and drips won’t pool in fat.
- Rest before serving – Let the dish sit 5 minutes after removing from oven. This lets the glaze reabsorb slightly and thickens it into that sticky-sweet coating we love.
7. Variations & Substitutions
Make this dish your own with these flexible tweaks:
Spicy Honey Butter Chicken – Add 1 tsp gochujang or sriracha to the glaze, or finish with a sprinkle of flaky sea salt and crushed red pepper flakes.
Sweet & Savory Swap – Replace half the honey with pure maple syrup for a deeper, more complex sweetness.
Gluten-Free/Fast-Carb – Skip any soy-based ingredients (none in this base recipe) or use tamari instead of soy sauce if adding. Serve over cauliflower rice or zucchini noodles.
Veggie Swaps – Try beets (roast separately first—their color can stain), sweet potatoes, baby potatoes, broccoli florets, or even sugar snap peas (add in last 5 minutes).
Protein Shift – Use bone-in chicken pieces (adjust cook time), turkey cutlets (watch carefully—they cook faster), or tofu steaks (press first for best crisp).
8. Storage & Reheating
Store cooled leftovers in an airtight container like the JoyJolt Airtight Glass Food Storage Set for up to 4 days. For longer storage, freeze in single portions for up to 3 months.
Reheating: → Oven (best for crispness) – 350°F for 15–20 minutes, uncovered. → Air fryer – 375°F for 5–7 minutes, shaking once halfway. → Microwave – Works, but may soften veggie edges—cover with a paper towel and heat in 60-second intervals.
Don’t reheat the glaze too long – It thickens dramatically on cooling. If leftovers seem dry, add a splash of chicken broth or water before reheating.
9. FAQ
Can I use chicken thighs instead of breasts?
Yes—and I *recommend* it! Thighs are more forgiving and stay juicy even if slightly overcooked. breasts work if cut uniformly and not overcooked (use a thermometer!).
Why is my honey butter sauce too sweet?
Honey varies in intensity—some floral honeys (like orange blossom) are milder, while wildflower can be bold. If sweetness dominates, add ½ tsp lemon juice or 1 tbsp apple cider vinegar to cut through. Salt also balances sweetness—don’t skip the pinch!
Can I make this gluten-free?
Absolutely—this recipe is naturally gluten-free. Just double-check your honey and butter for hidden additives (rare, but possible in some brands).
What do I serve with honey butter chicken?
It stands beautifully on its own, but I love it with a simple garden salad, crusty sourdough for soaking up sauce, or over fluffy jasmine rice. For more inspiration, check out our Sweet and Spicy Honey Pepper Chicken or Dump-and-Go Smothered Pork Chops for more one-pan wonders.
10. Conclusion
This honey butter chicken with roasted vegetables is more than just dinner—it’s comfort food made elevated, with that glossy, sticky-sweet glaze clinging to tender chicken and caramelized veggies. It’s flexible, fast, and foolproof, and it proves that quick weeknight chicken dinner shouldn’t mean sacrificing flavor or joy. Give it a try tonight, and let me know how your pan turns out in the comments—I read every one!
Print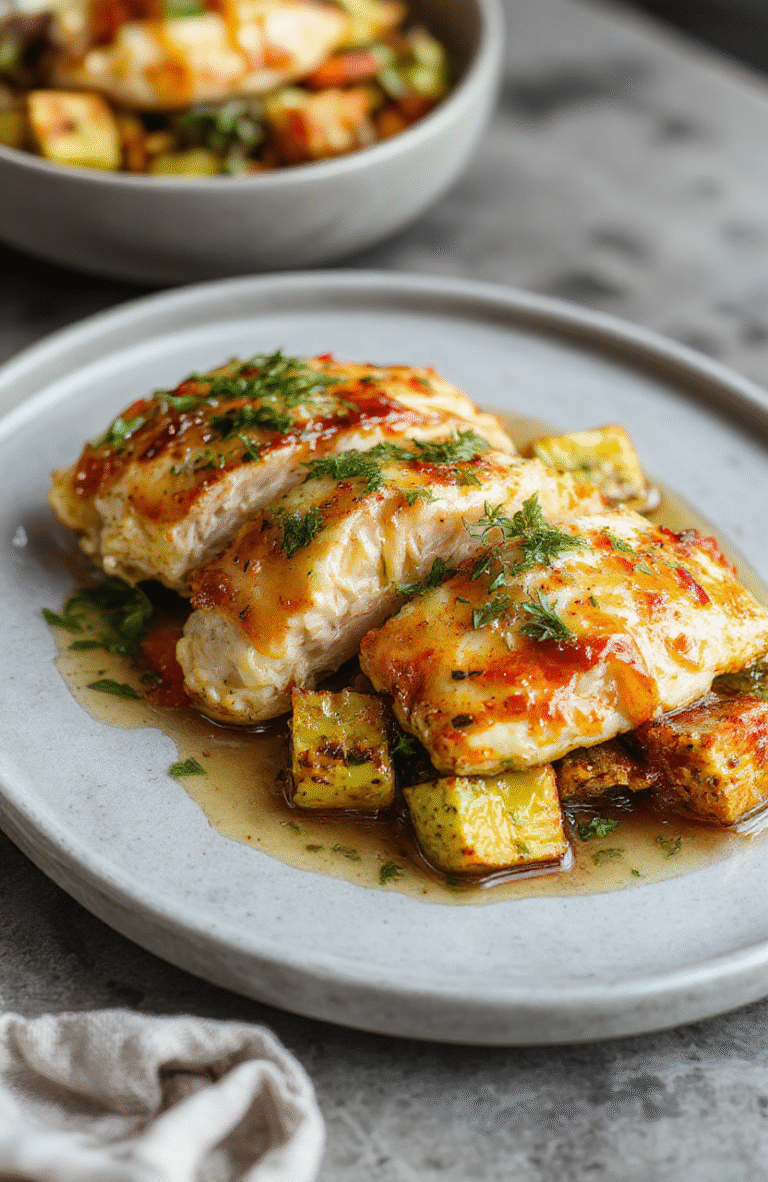
Honey Butter Chicken with Roasted Vegetables
A quick,one-pan honey butter chicken recipe that’s sweet, savory, and perfectly tender — ready in under 30 minutes with minimal cleanup.
- Total Time: 30 minutes
- Yield: 4 servings
Ingredients
- 1.5 lbs boneless skinless chicken thighs
- 2 tbsp olive oil
- 3 tbsp unsalted butter
- 3 tbsp honey
- 2 tbsp soy sauce
- 1 tbsp lemon juice
- 2 garlic cloves, minced
- 1/2 tsp Italian seasoning
- Salt & pepper to taste
- 2 cups baby carrots
- 1 cup broccoli florets
- Fresh parsley, chopped (for garnish)
Instructions
- Preheat oven to 400°F (200°C). Toss carrots and broccoli with 1 tbsp olive oil, salt, and pepper. Spread on a baking sheet.
- In a small bowl, whisk together honey, soy sauce, lemon juice, garlic, Italian seasoning, and remaining olive oil.
- Heat a large oven-safe skillet over medium-high heat. Pat chicken dry, season with salt and pepper, and sear 3–4 minutes per side until golden.
- Remove skillet from heat, pour honey butter sauce over chicken, then transfer to oven. Roast 10–12 minutes until chicken reaches 165°F.
- Remove from oven, let rest 3 minutes. Garnish with parsley and serve.
Notes
- For extra crispiness, broil 1–2 minutes at the end.
- Substitute chicken breasts if preferred, but reduce cook time to avoid dryness.
- Leftovers keep well for 3 days refrigerated.
- Prep Time: 10 minutes
- Cook Time: 20 minutes
- Method: Pan-sear & Roast
- Cuisine: American
- Diet: None specified
Nutrition
- Serving Size: 1 chicken thigh + 1/2 cup veggies
- Calories: 380 Kcal
- Sugar: 18g
- Sodium: 620mg
- Fat: 18g
- Saturated Fat: 6g
- Unsaturated Fat: 9g
- Trans Fat: 0g
- Carbohydrates: 26g
- Fiber: 4g
- Protein: 31g
- Cholesterol: 95mg