
🧀 The Effortless Charcuterie Board: Your New Go-To Party Hero (No Experience Required!) 🎉
1. Introduction
Imagine this: you’re hosting a casual gathering, and instead of stressing over cooking, you put together a beautiful, thoughtfully curated charcuterie board in under 20 minutes. Guests arrive to find a stunning display of cheeses, meats, fruits, nuts, and crunch—gathered on a single board and ready to enjoy. It looks impressive, tastes incredible, and takes almost no effort. In fact, a well-balanced easy appetizer like this is the perfect bridge between “I tried” and “I’m totally hosting like a pro.” Even better? It’s completely customizable and forgiving—perfect for beginners and ideal for last-minute plans.
2. Why You’ll Love This Recipe
- Ready in under 15 minutes—yes, really! No cooking required.
- No-fuss cheese board—no fancy tools or hard-to-find ingredients.
- Scalable & flexible—works for two guests or 20.
- Visually stunning—perfect for photos, weddings, game day, or baby showers.
- Cater to dietary needs—swap meats, cheeses, and add-ons with ease.
3. Ingredient Notes
The magic of an authentic charcuterie board lies in balance: texture, flavor, and contrast. Here’s how to build intelligence into every choice:
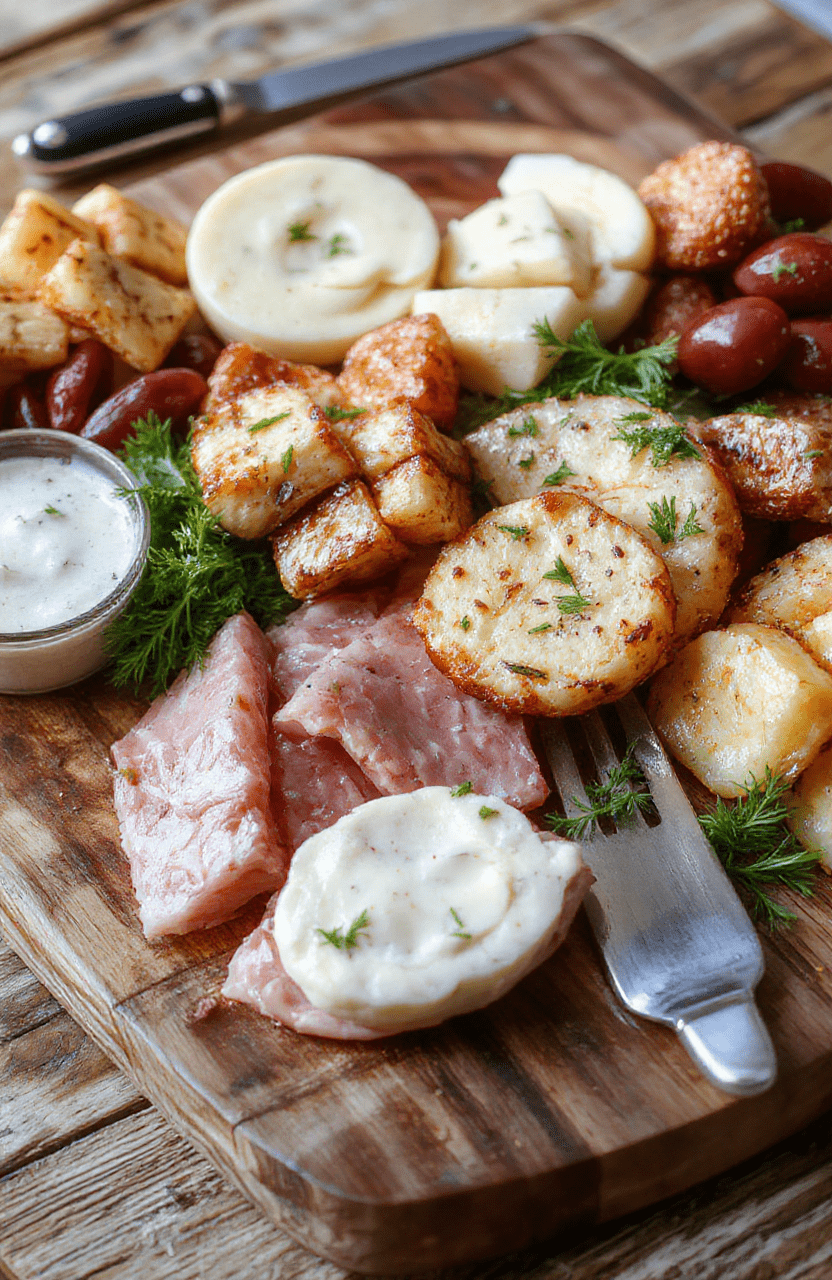
- Cheese: Pick 3–4 varieties—start with one soft (brie), one semi-soft (Havarti), and one hard (aged cheddar or manchego). Aim for 1–2 ounces per person. Look for cheese wrapped in wax or vacuum-sealed for peak freshness.
- Meats: Cured meats like prosciutto, salami, and chorizo add richness and texture. Roll or fold them for visual appeal. Opt for nitrate-free when possible for cleaner flavor.
- Fresh & dried fruit: Grapes (threaded on skewers for ease), sliced figs, pomegranate arils, or dried apricots offer sweetness that offsets salinity.
- Crunch elements: Spreadable items (honey, mustard, fruit jam) paired with sturdy crackers or sliced baguette add the vital “crunch” dimension.
- Accents: Almonds, pistachios, or pickled cornichons cut richness and add acidity. A small dollop of olive tapenade brings a savory “umami” boost.
Pro tip: Let cheeses sit at room temperature for 20–30 minutes before serving—the flavor and texture will transform dramatically!
4. Kitchen Tools You Need
You probably already own most of what you need—but here are a few upgrades that make assembly easier, faster, and more beautiful:
- Fullstar Ultimate Veggie Prep Master: Instantly slice apples, pears, and figs into uniform rounds—no wobbly knife work required. A game changer for presentation speed.
- Deluxe 33-Piece Silicone Utensil Set: Use small spoons for honey, mustards, and spreads. Heat-resistant, stain-proof, and easy to clean.
- JoyJolt Airtight Glass Food Storage Set: Store leftover cheeses and meats in these leak-proof containers—they keep flavors fresh and prevent cross-contamination.
- Clever Fox DIY Family Recipe Journal: Trace your favorite board combos, ingredient ratios, and guest reactions—it’ll become your go-to party playbook.
Still want to level up? The Ninja Woodfire Pro Connect XL doubles as a smoker—infuse walnuts or pecans with a whisper of hickory smoke in minutes. (Bonus: Add them to your board for gourmet flair.)
5. How to Make the Beginner Charcuterie Board
Phase 1: Prep & Lay the Base
Start with a clean wooden board, marble slab, or even a large ceramic platter. Before adding anything, place small bowls or ramekins for spreads (honey, grainy mustard, fig jam) in 2–3 corners to avoid crowding later.
Phase 2: Arrange Cheeses & Meats
Place cheeses evenly around the board—not too close! Use different shapes: cut the brie into wedges, fold salami into quarters or rolls, and slice the hard cheese thinly. A general rule: place 1 cheese near each spread for easy flavor pairing.
Tip: If your board feels sparse, add a line of grapes or sliced apples between cheeses as a visual “bridge.”
Phase 3: Build Texture & Color
Fill in gaps with your crunch element— crackers (fancy water crackers or rustic country loaves work well), toasted nuts, or even bread cubes. Add dried fruit clusters and small Pickling jars (like cornichons or olives) for pops of color and contrast.
Phase 4: Garnish & Serve
Drizzle 1–2 tablespoons of honey over the soft cheese or brie. Scatter fresh herbs like rosemary sprigs or sage leaves for height and aroma. Serve with small labeling tags (or just write names with chalk) if guests might be unsure—especially helpful for wine pairings or nut-free zones.
6. Expert Tips for Success
- Avoid overcrowding. It’s tempting to fill every inch—but leave space for fingers to grab easily.
- Go seasonal. In summer, add berries and chilled prosciutto-wrapped melon skewers. In winter, use roasted nuts, dried cranberries, and spiced honey.
- Bring out the board 10 minutes before serving. Cold meats and cheeses dull in flavor and firm up—letting them breathe makes all the difference.
- Use a cheese knife or spreader for each item—prevents flavor blending and keeps things clean.
- Save time with pre-sliced fruit. A quick soak in lemon water prevents browning on apples and pears.
7. Variations & Substitutions
- Vegan charcuterie board: Swap cheeses for almond-based cashew brie or almond cheese, use marinated tofu “bacon,” and focus on nuts, grapes, olives, and date-sweetened spreads.
- Gluten-free: Serve with rice crackers, sliced apple/pear, cucumber rounds, or gluten-free crackers like Mary’s Gone Crackers.
- Low-sodium option: Choose fresh fruits, veggies (bell peppers, cherry tomatoes), unsalted nuts, and reduced-salt cheeses like fresh mozzarella or goat cheese.
- kid-friendly version: Skip meats, focus on cheddar cubes, apple slices, seedless grapes, pretzel sticks, and chocolate-dipped pretzels (yes, it counts as “garnish”).
8. Storage & Reheating
Store separately: Keep cheeses wrapped in wax paper inside an airtight container (like the JoyJolt Glass Sets) for up to 5 days. Meats can be refrigerated in a sealed container for 2–3 days. Do not pre-assemble the board for more than 1 hour before serving—especially outdoors or in warm rooms.
To serve again: Bring cheeses to room temp. Refresh with new fruit (especially apples/berries). Add fresh crackers if they’ve softened.
9. FAQ
How much food do I need?
For a 2-hour party: plan for 1.5–2 ounces of cheese and 0.5–1 ounce of meat per person. Add 0.25–0.5 ounce of crackers, 2 oz of fruit, and 1 oz of nuts. For example: 8 guests = ~12 oz cheese + ~4 oz meat total.
Can I make this the night before?
Yes—but only prep components separately. Slice fruit, portion meats/cheeses into containers, prepare spreads. Assemble the board right before guests arrive.
What wines pair best?
Cabernet Sauvignon or Tempranillo with aged cheeses. Sauvignon Blanc or Pinot Grigio cuts richness beautifully. For something unexpected, try off-dry Riesling with salty meats and hard cheese.
My board looks too plain—how do I jazz it up?
Try: arranging cheese in a flower pattern, using mini wooden spoons for dips, or adding a small bowl of edible flowers (like nasturtiums) and a handwritten “Mix & Match Guide” card.
10. Conclusion
Creating a charcuterie board doesn’t require culinary expertise—just thoughtful pairing, confidence, and a little creativity. With these no-fuss building blocks, you’ll host with joy instead of stress. And when guests swoon over how “restaurant-worthy” it looks? You’ll smile, refill your wine, and quietly grab another grape from your own board. 🍇✨
Love easy, crowd-pleasing recipes? Dive into more fan favorites like Easy Buffalo Chicken Sliders, or warm up with the ultimate Chocolate Banana Bread for dessert. Your next gathering just got a whole lot tastier!
Print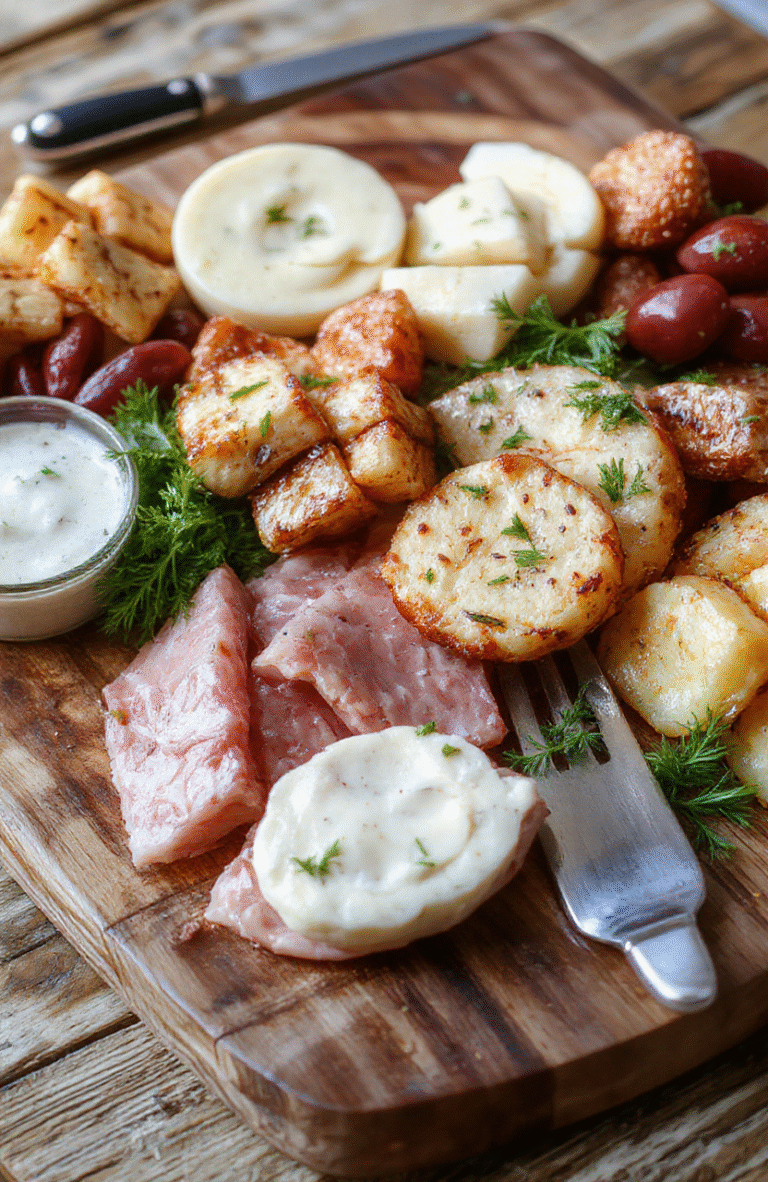
Beginner Charcuterie Board: Simple Party Appetizer
No-fuss, crowd-pleasing charcuterie board using simple, store-bought ingredients. Perfect for last-minute entertaining.
- Total Time: 10 minutes
- Yield: 8 servings
Ingredients
- 8 oz dried prosciutto, thinly sliced
- 8 oz salami, sliced
- 6 oz aged cheddar, cubed
- 6 oz brie, rind on, whole
- 1 cup green grapes, halved
- 1/2 cup dried figs, halved
- 1/4 cup mixed olives
- 2 tbsp honey, plus extra for drizzling
- 1 Baguette, sliced and toasted
- 1 cup mixed crackers
Instructions
- Arrange the cheeses on a large wooden board or serving platter, spacing them evenly.
- Fan out the sliced meats in small piles around the cheeses.
- Add bowls or small ramekins for olives, honey, and figs.
- Fill empty spaces with grapes, crackers, and bread slices.
- Drizzle honey over the brie and serve immediately.
Notes
- For vegetarian guests, substitute meats with roasted vegetables or marinated chickpeas.
- Prepare the board up to 2 hours in advance; keep cheeses refrigerated until serving.
- Pair with a crisp white wine or sparkling water for a refreshing touch.
- Prep Time: 10 minutes
- Cook Time: 0 minutes
- Method: Assembly
- Cuisine: American
- Diet: Contains Dairy, Gluten
Nutrition
- Serving Size: 1 plate (approx. 250g)
- Calories: 320 Kcal
- Sugar: 12g
- Sodium: 780mg
- Fat: 22g
- Saturated Fat: 10g
- Unsaturated Fat: 9g
- Trans Fat: 0g
- Carbohydrates: 18g
- Fiber: 2g
- Protein: 14g
- Cholesterol: 55mg